How Paint Correction Turns a Fresh Paint Job Into a Mirror Finish
From wet sanding grits to clear-coat thickness, here's what it takes to level a fresh paint job to show-car gloss.
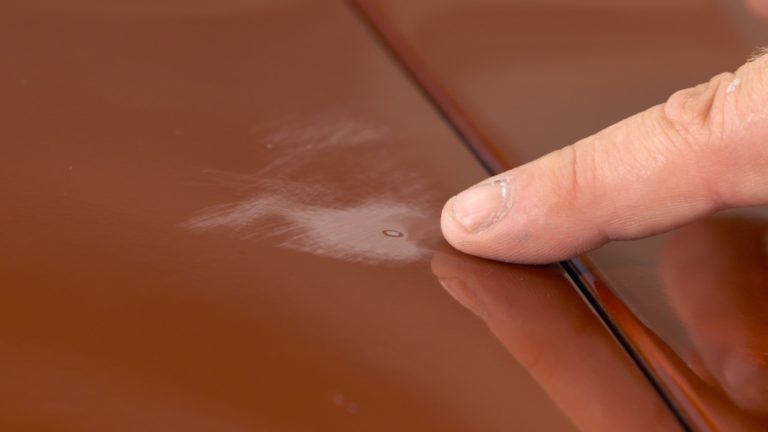
What exactly is paint correction and why does a fresh paint job need it?
Paint correction is the process of leveling a freshly painted clear coat to remove surface imperfections such as dust nibs, dirt particles, and orange peel. Even a brand-new paint job from a top shop like MCA Customs—think Matt Roehrock's recently completed Buick Riviera—comes out of the booth with minor flaws that distort light reflection. The goal is a perfectly flat surface that produces sharp, mirror-like reflections rather than the wavy, blurred ones caused by texture. Orange peel, which makes the paint look like an orange's skin, is the most common culprit. By sanding and polishing the clear coat, a technician removes the high spots and flattens the surface. The result is the deep, glass-like finish you see on high-end show cars. Without correction, even a beautifully painted classic will reflect light unevenly and won't have that crisp depth enthusiasts look for.
What is color sanding and what grits do you use?
Color sanding—often called wet sanding—is the first physical step in paint correction. Using progressively finer sandpaper, the technician levels the clear coat to remove the tops of imperfections. On the Buick Riviera, Matt Roehrock started with 800 to 1500 grit and worked up to 3000 grit or finer. The lower grits (800–1500) aggressively remove orange peel and level the surface, while the higher grits (3000 and above) smooth out the scratches left by the coarser papers. The key is to remove just enough material to eliminate the texture without sanding through the clear coat. Dust nibs and dirt particles are spot-sanded individually until the entire panel is uniformly smooth. After color sanding, the paint looks dull and hazy—that's normal. The gloss hasn't been restored yet; that comes in the polishing stage.
How does polishing restore gloss after sanding?
Polishing is the multi-stage process that brings back the gloss after color sanding leaves the paint hazy. First, a cutting compound removes the sanding scratches left by 3000-grit paper. This is an abrasive step that levels the clear coat further, but with a much finer cut than sandpaper. Next, finer polishes are used to eliminate swirl marks and increase clarity. Finally, a finishing polish—often called jeweling—maximizes gloss, depth, and reflection quality. Each stage uses progressively less abrasive products, so the surface becomes smoother and more reflective with each pass. On a job like the Buick Riviera, this can take several hours per panel, depending on the condition of the paint and the skill of the technician. The result is a surface that reflects light cleanly, with no haze, swirls, or distortion.
Why do some restorers apply extra clear coat before paint correction?
Extra clear coat is applied specifically to give the technician enough material to work with during sanding and polishing. Matt Roehrock applied seven coats of clear coat to the Buick Riviera—more than the typical three or four found on most production paint jobs. This added thickness is a safety buffer. It allows the technician to level orange peel aggressively without risking burning through the clear coat, which is especially important on edges and body lines where the paint is thinner and wear is more likely. Without that extra material, a single mistake—like sanding too deep on a sharp crease—can go straight through to the base coat, requiring a respray of that panel. For a show-quality finish, that extra clear coat is a practical investment. It's the difference between being able to flatten the surface completely and having to leave some texture to stay safe.
What happens if you sand through the clear coat during paint correction?
Sanding through the clear coat is the worst-case scenario in paint correction. It exposes the base coat, which is not designed to be polished, and it cannot be repaired by polishing—you have to respray the affected panel. The risk is highest on edges and body lines, where the clear coat is naturally thinner and where a sanding block can easily dig in. If you burn through, you're back to the paint booth, which adds significant time and cost to a restoration. Even with careful technique, edge work is always a risk. The skill of paint correction is knowing how much pressure to use and where to back off, especially around sharp contours. This is not a step for the impatient.
What's the difference between a cutting compound and a finishing polish?
A cutting compound is the coarsest polishing product, designed to remove sanding scratches. It uses larger abrasive particles to level the clear coat quickly. Finishing polish, on the other hand, uses much finer abrasives to eliminate the micro-scratches left by the compound and to refine the surface to a high gloss. The final step, jeweling, goes even further—it uses an ultra-fine polish to maximize depth and clarity. On the Buick Riviera, Matt Roehrock would have started with a cutting compound to knock down the sanding marks, then switched to finer polishes to remove the haze, and finished with jeweling to get that mirror shine. Skipping steps or jumping straight to a finishing polish won't work—the sanding scratches are too deep. You need the progressive refinement to achieve a flawless, glass-like surface.